Can’T Get Springs on Trampoline
If you’re like me, you love spending time outdoors on your trampoline. But one thing that can ruin a good time is not being able to get the springs on your trampoline. Here are a few tips to help you get the springs on your trampoline so you can enjoy it for years to come.
Springs are one of the most important parts of a trampoline, and without them, your trampoline won’t be nearly as much fun. But if you can’t get springs on your trampoline, don’t despair – there are still plenty of ways to enjoy your spring-less trampoline.
For starters, you can still use it as a regular bounce house.
Just take out the jump mat and let the kids (or adults!) have at it. You can also set up some obstacle courses or other games that don’t require jumping.
If you’re feeling really adventurous, you could even try using your trampoline as a slackline!
Just be sure to secure the line properly so nobody gets hurt.
No matter how you use it, a spring-less trampoline can still be tons of fun. So don’t give up on yours just because it doesn’t have springs – make the most of it and have a blast!
What is the Easiest Way to Put Springs on a Trampoline?
If you’re looking to add springs to your trampoline, there are a few things you’ll need to take into consideration. The size of your trampoline, the type of spring, and the number of springs needed will all play a role in how easy (or difficult) it is to put them on.
In general, however, the easiest way to put springs on a trampoline is by first measuring the circumference of the frame.
Once you have this measurement, you can purchase springs that are slightly longer than half the circumference. For example, if your frame has a circumference of 12 feet, you’ll want to purchase 14-foot long springs.
Next, use pliers to attach each spring at its center point to the inside of the trampoline frame.
Be sure to leave enough slack so that the spring can stretch when someone jumps on the trampoline. Finally, connect each end of the spring using hooks or clamps. Again, make sure there is enough slack so that jumping doesn’t cause any damage.
With a little bit of effort, adding springs to your trampoline can be a relatively easy process!
How Do You Put Springs on a Trampoline Hack?
If your trampoline has lost its bounce, it might be time to put new springs on it. This is a relatively easy process that you can do yourself with just a few tools. Here’s how to put springs on a trampoline:
1. Remove the old springs. This will involve unhooking them from the frame of the trampoline. If they’re corroded or otherwise difficult to remove, you may need to use a rust dissolver or other type of lubricant.
2. Clean the area where the springs will be attached. This will help ensure that the new springs grip properly and don’t slip off.
3. Attach the new springs.
Hook them onto the frame of the trampoline, making sure they’re tight and secure.
4. Test out the new springs by jumping on the trampoline! You should feel a significant difference in bounce compared to before.
What to Use to Put Springs on Trampoline?
Leaf springs are the most common type of spring used on trampolines. They are made of steel and designed to flex and absorb shock. Attaching them to the frame of the trampoline is relatively simple and can be done with basic tools.
Coil springs are another option, but they require special brackets and more time to install.
Can You Use a Trampoline With Missing Springs?
No, you cannot use a trampoline with missing springs. Springs are an essential part of a trampoline and provide the necessary tension and support for the mat. Without springs, the trampoline will not be able to bounce and will be significantly less safe.

Credit: sunshineandplay.com
How to Put the Last Springs on a Trampoline
If you’re like most people, you probably wait until the last possible moment to put away your trampoline for the winter. But did you know that there’s a right way and a wrong way to do it? Here’s how to put the last springs on a trampoline so that it will be ready for next season:
1. Remove all of the tension from the springs. You can do this by removing the spring covers and gently pushing down on each spring.
2. Once all of the tension is gone, fold up the trampoline mat and set it aside.
3. Unbolt each leg from the frame and set them aside as well.
4. Now you can remove the frame itself from the ground. Be careful not to damage any of the parts as you do this.
5. Finally, store everything in a dry, safe place until next season!
Trampoline Spring Hacks
Are you looking for ways to get the most out of your trampoline? If so, you’re in luck! There are a number of trampoline spring hacks that can help you maximize your jumping experience.
Here are four great hacks to get you started:
1. Use Washers to Extend the Life of Your Springs
If you want your springs to last longer, consider adding washers to them.
This will help distribute the weight more evenly and prevent wear and tear. Simply place a washer on each spring before attaching it to the frame.
2. Lubricate Your Springs Regularly
To keep your springs working like new, be sure to lubricate them regularly. You can use WD-40 or a similar product. Just spray it on and wipe away any excess with a rag.
Doing this once a month will help ensure that your springs are always in good condition.
3. Protect Your Springs from the Elements
If you live in an area with extreme weather conditions, it’s important to take steps to protect your springs from rusting or other damage.
One way to do this is by covering them with tape or another type of sealant when they’re not in use. This will help extend their life significantly.
4 Replace Worn Out Springs Promptly
Over time, even the best-made trampoline springs will eventually wear out and need to be replaced . When this happens , don’t wait too long to make the switch . Otherwise , you risk damaging the frame or mat . Also , keep in mind that worn out springs can also pose a safety hazard . So , if you notice any signs that yours are ready for retirement , don’t hesitate to replace them .
Trampoline Assembly Problems
If you’ve ever had the misfortune of having to assemble a trampoline, then you know the pain that can come with it. There are seemingly endless pieces to put together, and if even one is done wrong, the entire thing can be ruined. It’s no wonder that so many people have trouble when it comes to putting together a trampoline – it’s just not an easy task.
However, there are some things that you can do to make the process easier on yourself. First of all, make sure that you have all of the necessary tools and parts before you start. This might seem like a no-brainer, but it’s really easy to forget something when you’re in the middle of putting together a trampoline.
Secondly, take your time and don’t rush through the process. It might be tempting to try and hurry so that you can get onto the fun part (jumping!), but rushing will only lead to mistakes being made.
Finally, if you’re really struggling with putting together your trampoline, don’t be afraid to ask for help from someone who has more experience.
Chances are, they’ll be able to get it done much quicker than you would’ve been able to on your own. All in all, assembling a trampoline isn’t an easy feat – but it’s definitely doable as long as you’re prepared and take your time!
How to Attach Springs
Springs are a great way to add some extra tension and support to your projects, but attaching them can be tricky. Here’s a step-by-step guide on how to do it:
1. first, you’ll need to gather your materials.
You’ll need the spring itself, as well as some wire or string.
2. next, take one end of the wire or string and tie it around the top of the spring. Make sure it’s tight so that the spring can’t slip out.
3. now, take the other end of the wire or string and attach it to whatever you’re wanting to use the spring for. again, make sure it’s secure so that the spring doesn’t come loose.
4. finally, test out your project to make sure everything is working correctly.
If not, go back and check your connections to make sure they’re tight enough.
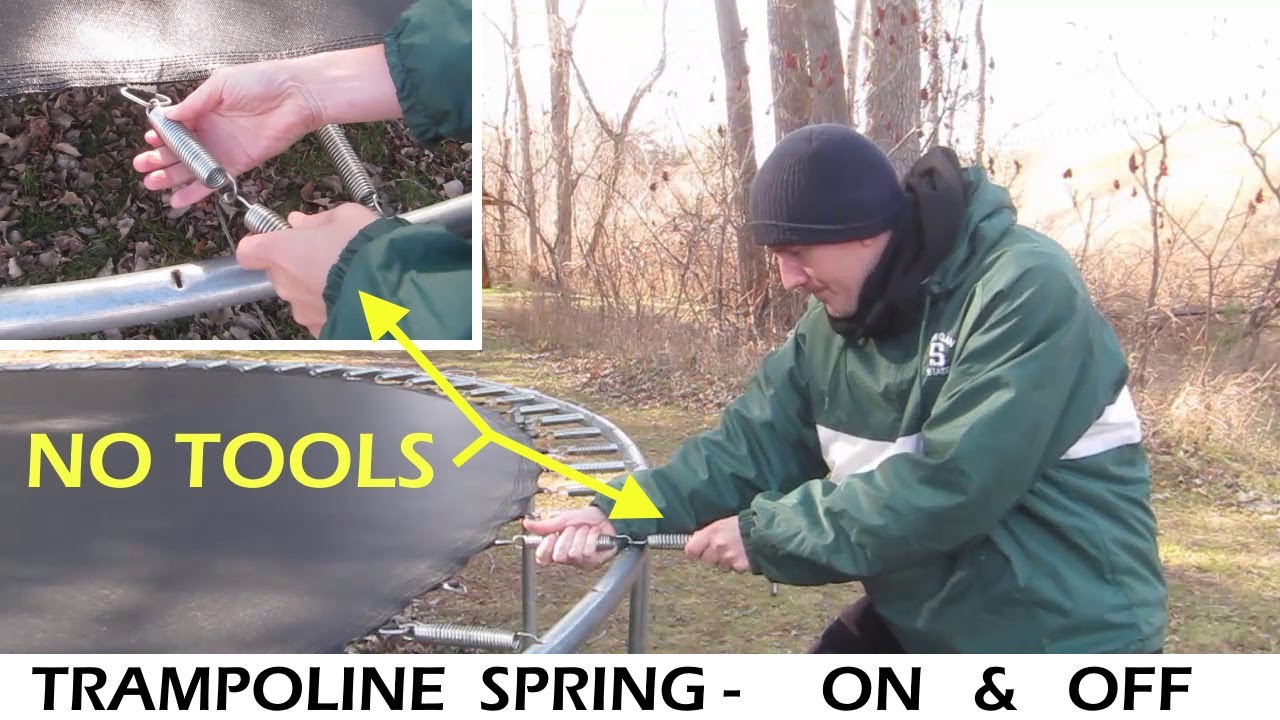
How to Take Trampoline Springs off Without Tool
Assuming you have no trampoline spring tool, there are a few ways you can remove your trampoline springs without one. The most common way is to use a pair of pliers. You will want to grip the bottom of the spring where it meets the frame and pull up.
Some people find it helpful to put the pliers on upside down so that the teeth are pointing towards you as you pull up. You may also need to twist the pliers as you pull up in order to loosen the grip of the spring on the frame.
Another way to remove trampoline springs without a tool is to use a screwdriver.
This method requires two people as one person holds onto the end of the spring while the other person uses the screwdriver to pry it off from underneath. It is important not to let go of the spring until it has been completely removed from its socket or else it will fly across the room and could potentially injure someone.
The final way to remove trampoline springs without using a tool is by using brute force.
This means that you simply grab hold of each end of the spring and pull until it comes out. This method requires a lot of strength, so if you are not very strong, it might be best to try one of the other methods first. Whichever method you choose, be sure that everyone in your household knows how to safely remove trampoline springs before attempting any sort of repair or maintenance on your equipment.
How to Tighten Trampoline Springs
Springs are an essential part of any trampoline, providing the tension and bounce that makes jumping fun. Over time, however, springs can loosen and lose their elasticity. This not only reduces the quality of your jump, but can also be dangerous if a spring were to come loose while you were using the trampoline.
There are a few things you can do to tighten trampoline springs and keep your jumping surface safe and bouncy. First, check all of the bolts that hold the frame together and make sure they are tight. Next, take a look at the mat and see if it is starting to sag in any areas – if so, you may need to replace some of the springs.
Finally, inspect each individual spring to see if it needs to be tightened.
If you find that your trampoline springs are getting loose, don’t wait to fix them! Loose springs can cause serious injury if someone were to land on them wrong.
With a little bit of maintenance, however, you can keep your trampoline in good condition for years to come – and enjoy many safe hours of bouncing fun!
How to Put Springs on a Rectangular Trampoline
You may be wondering how to put springs on a rectangular trampoline. Springs are an important part of a trampoline, as they provide the bounce. There are several ways to put springs on a rectangular trampoline, and the method you choose will depend on the type of trampoline you have.
If you have a traditional spring-loaded trampoline, then attaching the springs is relatively straightforward. The first step is to identify where the holes are located in the frame of your trampoline. Next, take a spring and loop it through the hole, making sure that the coils are facing downwards.
Once all of the springs are in place, you can start jumping!
If your rectangular trampoline has stretch bands instead of springs, then you’ll need to attach them slightly differently. First, identify where the hooks are located on your frame.
Next, take a band and hook it onto one side of the frame before stretching it across to the other side and hooking it on there too. Repeat this process until all of the bands are in place. And that’s it – you’re ready to start bouncing!
How to Remove Trampoline Springs
If your trampoline springs are beginning to show signs of wear and tear, it’s important to replace them as soon as possible. Not only will this help to keep your trampoline in good working condition, but it will also ensure that users remain safe while using it. Here’s a step-by-step guide on how to remove trampoline springs:
1. Begin by removing the mat from the trampoline frame. This will give you better access to the springs.
2. Using a pair of pliers, grasp onto one end of the spring and pull it away from the frame until it is completely detached.
Repeat this process for each spring on the trampoline.
3. Once all of the springs have been removed, take a look at the holes where they were attached. If there is any rust or damage present, use sandpaper or a wire brush to clean up these areas before attaching new springs.
4. To attach new springs, simply hook one end onto the hole on the frame and then stretch out the other end until it meets its counterpart on the opposite side of the frame. Make sure that each spring is securely in place before moving onto the next one.
5 .
Once all of the new springs are in place, reattach the mat and give your trampoline a test bounce!
Conclusion
If you’re having trouble getting springs on your trampoline, don’t worry – you’re not alone. Many people have the same problem. The good news is that there are a few things you can do to make it easier.
First, make sure that all of the springs are the same size. If they’re not, it will be very difficult to get them on evenly. Second, use a lubricant such as WD-40 or Vaseline to help the springs slide into place.
Third, try using pliers or a spring hook to help guide the springs into place.
With a little bit of patience and perseverance, you should be able to get those springs on in no time!

14 Ft Trampoline Assembly Instructions
If you’re lucky enough to have a 14 ft trampoline in your backyard, you may be wondering how to go about assembling it. While it may seem like a daunting task, assembling a 14 ft trampoline is actually quite easy – as long as you have the right instructions.
Are you looking for a fun activity for your family? A trampoline is a great way to get everyone moving, and it can be done right in your own backyard! Here are assembly instructions for a 14 ft. trampoline, so you can get started on hours of family fun!
First, lay out all of the parts in an open area. You will need: the trampoline frame, the safety enclosure netting, the jumping mat, 72 springs, 4 wind stakes, and the instruction manual. Read through the instruction manual before beginning assembly.
Next, assemble the trampoline frame. Begin by inserting the 6 outer legs into the notches on the 6 curved arms. Then interlock the 2 halves of each T-joint by sliding them together until they click into place.
Do this for all 12 T-joints. Once completed, stand up the frame and make sure that all joints are locked into place.
Now it’s time to attach the safety enclosure netting to the frame.
Start at 1 corner and stretch the netting around 1 side of the frame until you reach The opposite corner. There should be excess netting at each end; do not cut off any excess material yet! Attach Velcro strips along both edges of excess netting at each end; these will be used to secure The ends of The netting once it has been wrapped around The entire frame.
Continue stretching The netting around The other 3 sides of The frame in The same manner; when you reach The starting point again, overlap The 2 sections of netting and secure with more Velcro strips. Trim off any remaining excess material fromThenettingbefore moving ontoThe next step..
Finally, it’s time to addThe jumping matand springs! PlaceThematonTopofTheframeand begin attaching springs at eachcorner; there should be18springsattachedtoEachsideoftheframewhenyou’refinished(72springs total). Make sureThatallspringsareFacingthesamewaybeforesecuringthemwith hooks or clips topreventinjurywhile usingthetrampoline.
How Do You Put Together a 14 Foot Trampoline?
Assuming you would like a blog post discussing how to put together a 14-foot trampoline:
A 14-foot trampoline is a great addition to any backyard. They are perfect for kids and adults alike, providing hours of fun and exercise.
But before you can start jumping, you need to put the trampoline together. Luckily, most 14-foot trampolines come with easy-to-follow instructions. Here is a step-by-step guide on how to put together your new 14-foot trampoline:
1. Start by unboxing the trampoline and spreading out all of the parts on a level surface. Make sure you have all of the required tools handy: a Phillips head screwdriver, pliers, and an adjustable wrench.
2. Next, attach the legs to the bottom of the frame using the bolts provided in the kit.
Tighten each bolt securely with your wrench or pliers.
3. Once the legs are attached, stand up the frame and begin attaching the springs to their designated spots around the edge of the frame. Make sure that each spring is properly secured before moving on to attaching the next one.
4. After all of the springs are in place, it’s time to stretch out The mat over top of them and secure it in place along The perimeter With The clips provided In The kit.. Be sure That The mat Is taunt And free Of wrinkles Before proceeding To Step 5..
If there Are Any wrinkles Or creases In The matting, They will become permanent once you start jumping on Thetrampoline.. 5..
Now It’s time For some Fun! Invite friends Or family Over And Have A blast Jumping On Your New14 Foot Trampoline!.
How Long Does It Take to Put a 14Ft Trampoline Together?
It takes about an hour to put a 14ft trampoline together. The first step is to find a level spot in your yard and lay out the mat. Then, you will need to secure the frame to the ground with either stakes or sandbags.
Once the frame is secure, you can start attaching the springs. There are typically 96 springs on a 14ft trampoline. Once all of the springs are attached, you can stretch out the mat and start jumping!
How Do You Set Up a Trampoline Step by Step?
Before you set up your trampoline, it is important to make sure that you have all of the necessary parts and tools. You will need:
-A level surface: This can be achieved by placing the trampoline on grass or on a mat.
If you are setting up the trampoline indoors, make sure that there is enough clearance around the perimeter of the room.
-Anchoring stakes: These are used to secure the legs of the trampoline to the ground. Make sure that they are placed in a location where they will not interfere with jumping.
-Jumping mat: This is what provides the surface for jumping and should be attached to the frame before attaching springs.
-Springs: There should be an equal number of springs on each side of the frame, and they should be evenly spaced. Attach them to hooks on the frame and stretch them out so that they are taut.
-Padding: This goes around the outside of the frame and over top of the springs to provide extra cushioning. It is important to make sure that there are no gaps between padding and springs so that jumpers will not get injured.
Once you have all of your materials, follow these steps to set up your trampoline:
1) Place anchoring stakes in desired locations and attach legs of trampoline to them using ropes or straps.
2) Assemble frame by connecting poles at joints using clamps or screws (depending on type of frame).
3) Spread out jumping mat over frame and attach it along edges using hooks or ties.
4) Stretch springs out evenly around perimeter offrame and hook them onto hooks along edge of mat.
How Do You Put a Trampoline Together at Walmart?
If you’re looking for a new trampoline, Walmart is a great place to start your search. They carry a wide variety of trampolines, from small round ones to large rectangular ones. And they have them in all different price ranges, so you can find one that fits your budget.
Putting a trampoline together is not as difficult as you might think. With a little help from some friends or family members, you should be able to get it done in no time. Here’s what you’ll need to do:
1. First, lay out all of the parts of the trampoline on the ground in the order that they will be assembled. This will make it easier to keep track of everything and avoid any confusion later on.
2. Next, begin assembling the frame of the trampoline according to the instructions provided.
It’s important to make sure that all of the pieces are properly connected and tightened before moving on.
3. Once the frame is complete, it’s time to add on the mat. Again, follow the instructions carefully to ensure that it’s properly attached at all points.
4. Finally, add on the safety netting around the edge of the trampoline (if desired). Make sure that it’s securely fastened so that there are no gaps through which someone could fall off of the trampoline.

Credit: www.wikihow.com
Trampoline Assembly Instructions Pdf
Are you looking for trampoline assembly instructions? If so, you’ve come to the right place. In this blog post, we’ll provide detailed instructions on how to assemble a trampoline.
We’ll also include a PDF of the assembly instructions so you can follow along at home.
Assembling a trampoline is a relatively easy process, but it’s important to follow the instructions carefully. First, you’ll need to gather all of the necessary tools and materials.
These include:
– Trampoline frame
– Springs
– Jump mat
– Safety padding
– Ladder (if needed)
Once you have all of your materials, you can begin assembly. The first step is to connect the trampoline frame together. Depending on the model, this may require bolts or screws.
Once the frame is together, you can attach the springs. There should be one spring per hole around the edge of the frame. Next, stretch out the jump mat over the frame and secure it with straps or clips.
Finally, add any safety padding around the edge of the trampoline. This will help prevent injuries if someone falls off while jumping.
Skywalker 14 Ft Trampoline Assembly Instructions
If you’re looking for Skywalker 14 Ft Trampoline Assembly Instructions, look no further! We’ve got all the info you need to get your trampoline up and running in no time.
First, gather all the parts and tools you’ll need for the job.
You’ll need the trampoline frame, mat, spring set, pole set, U-bolts and nuts, washers, and assembly instructions. Once you have everything gathered, follow these simple steps:
1. Attach the legs to the outside of the upper frame using the U-bolts and nuts.
Tighten securely.
2. Unfold the frame so that it is flat on the ground. If needed, put weight on each corner of the frame to keep it from moving while you work.
3. Install springs ontoframe according to manufacturer’s instructions or diagram included with your kit (typically there are eight springs).
4Install mat ontoframe making sure that hooks on mat are facing down towards ground 5Thread each spring through a hole inthe mat until it rests inthe groove onthe outside ofthe frame 6Re-check thatall hardwareis tightbefore allowinganyone ontothe trampoline 7Enjoy!
Yorin Trampoline Instructions
Assuming you would like a blog post on how to set up a Yorin trampoline:
Yorin Trampoline Instructions
Setting up your Yorin trampoline is quick and easy – follow these simple instructions and you’ll be jumping in no time!
1. Start by placing the mat in the middle of the frame. Make sure that the black side of the mat is facing up.
2. Next, take the 16 legs and insert them into the holes around the outside of the frame.
hand-tighten each leg until it’s snug against the frame.
3. Now it’s time to stretch out the mat! Start in one corner and pull firmly on all four sides of the mat until it’s tight against the frame.
Repeat this process in each corner until the entire mat is stretched out and taunt.
4. That’s it – your Yorin trampoline is now ready for use! Just make sure to give it a good bounce before letting anyone jump on, just to be safe.
12 Ft Trampoline Assembly Instructions
Are you looking for a great activity for your kids that will get them outside and active? A trampoline is a perfect option! But before you can start bouncing, you need to assemble it.
Here are detailed instructions on how to put together a 12-foot trampoline.
First, lay out all of the parts in the area where you will be assembling the trampoline. Make sure you have all of the following:
-Frame
-Springs
-Jump mat
-Enclosure netting
-Poles for enclosure netting
Next, begin by attaching the frame to the base with the included bolts.
Tighten these until they are snug. Then, attach the springs to the frame using the hooks provided. There should be 48 springs total.
Once all of the springs are in place, stretch them out and hook them onto the other side of the frame. This will take some effort – ask another person to help if needed.
16 Ft Trampoline Assembly Instructions
Assuming you have all the necessary parts and tools, here are trampoline assembly instructions for a 16-ft round model. Note that these instructions are just a guide – always refer to your specific trampoline’s manual for complete assembly information.
1. First, lay out all of the frame parts in the order they will be assembled.
Make sure the holes on each part line up so that the bolts can be inserted easily.
2. Insert the first set of legs into the footplates and secure with bolts (tighten with wrench). Be sure to leave enough room between the legs so that the mat can be installed later.
3. Next, connect two opposite sections of the frame together with joints and bolts (again, use wrench to tighten). Repeat this process until all four sections of the frame are connected together.
4. Now it’s time to install the springs.
Begin by attaching one end of each spring to its corresponding hole on the frame section. Then stretch out the other end of the spring and hook it onto The Ring – do this for all 48 springs (24 per side).
5. Once all of The Springs Are Hooked Onto The Ring, You Can Install The Mat By First Laying It Out On Top Of The Frame And Then Attaching It To The Springs With Clips Or Ties (Again, Refer To Your Specific Trampoline’s Manual For Complete Instructions).
Sportspower Trampoline Instructions
If you’re looking for some trampoline fun, the Sportspower 12-foot Trampoline is a great option. This trampoline features 96 springs for plenty of bounce, and the frame is made of heavy duty steel for durability. The mat is also UV resistant to help it withstand the elements.
Plus, the Sportspower 12-foot Trampoline comes with a safety enclosure so you can jump with confidence knowing that your little ones are safe.
Assembling your Sportspower 12-foot Trampoline is easy – just follow these simple instructions. First, lay out all of the parts in an open area.
You’ll need two people to assemble this trampoline, as one person will hold the parts while the other tightens the bolts. Next, connect the four legs to the circular frame using the provided bolts and washers. Make sure that each leg is evenly tightened before moving on to the next one.
Now it’s time to connect the jumping mat to the frame using 72 spring hooks (36 on each side). Start by attaching six hooks at each corner ofthe mat, then work your way around until all 72 hooks are in place. Once all ofthe hooks are secure, stretch outthe safety enclosure netting overthe frame and attachit at each point wherethe netting meets theorange cap – there should be 24 connection points total.
Finally, giveeverything a once-overto make surethatalloftheropeandnettingissecurely fastenedbefore lettinganyoneonto thistrampoline!
15 Ft Trampoline Instructions
Are you looking for a fun activity to do with your family and friends? If so, consider purchasing a 15 ft. trampoline! Not only is this a great way to get some exercise, but it’s also a lot of fun.
Here are some instructions on how to set up and use your new trampoline:
1. First, find a level spot in your yard to set up the trampoline. It’s important that the ground is level so that the trampoline will be stable.
2. Once you’ve found the perfect spot, unpack all of the trampoline parts and lay them out on the ground.
3. Begin assembling the frame by connecting the two side rails together with the crossbars. Make sure that all of the connections are tight and secure before moving on.
4. Next, attach the spring system to the frame using the provided hardware. Again, make sure everything is tight and secure before continuing.
Airzone 14 Ft Trampoline Assembly
Are you looking for a fun activity for your kids this summer? A trampoline is the perfect way to keep them entertained and active. The Airzone 14 Ft Trampoline Assembly is a great option for any family.
This trampoline has a weight limit of 200 lbs, making it perfect for kids of all ages. It also comes with a safety net enclosure, so you can be sure your kids are safe while they’re playing. The best part about this trampoline is that it’s easy to assemble – you won’t have to spend hours putting it together!
Conclusion
If you’re looking for step-by-step instructions on how to assemble a 14 ft. trampoline, you’ve come to the right place! In this blog post, we’ll walk you through everything you need to know, from unpacking the box to attaching the safety net. We’ll even provide a few tips along the way to help make the process as smooth as possible.
So whether you’re a first-time trampoline assembler or a seasoned pro, be sure to follow these simple steps and you’ll have your new trampoline up and ready to bounce in no time!

Leader blood pressure monitor
The Leader blood pressure monitor is a battery-operated device that measures blood pressure and heart rate. It has a cuff that wraps around the upper arm to measure blood pressure, and a finger clip to measure heart rate. The monitor displays the measurements on a LCD screen. It can store up to 60 measurements, and includes a date and time stamp. The Leader blood pressure monitor is latex-free and has a user-friendly design.
[autoaiwriter module=AmazonNoApi template=list]
Review of Leader blood pressure monitor
1. Extra Large Blood Pressure Cuff, ELERA 9”-20.5” Inches (22-52CM) XL Replacement Cuff for Big Arm, Compatible with Omron BP, Cuff Only
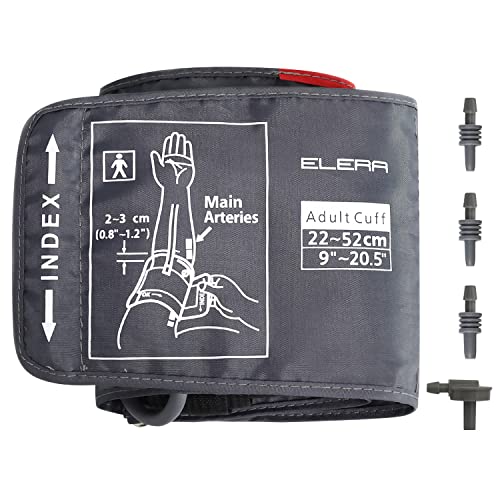
Description:
The ELERA 9”-20.5” Inches (22-52CM) XL Replacement Cuff for Big Arm is a replacement cuff for big arms that is compatible with Omron BP. This cuff is extra large, making it perfect for those with larger arms. It is made of durable materials and is easy to use.
Advantages
1. The extra large blood pressure cuff is designed to fit larger arms, making it ideal for those with larger frames.
2. The cuff is made from a durable and sturdy material, ensuring that it will last for many years.
3. The cuff is easy to use and is compatible with a wide range of blood pressure monitors.
4. The cuff is comfortable to wear and does not cause any irritation or discomfort.
5. The cuff is accurately calibrated and provides accurate readings every time.
Disadvantages
-The cuff size may be too large for some people
Editors opinion
The Extra Large Blood Pressure Cuff is perfect for those with larger arms. The cuff is 9”-20.5” inches (22-52CM) in size, which is compatible with the Omron BP machine. The cuff is made of durable material and is easy to clean. It is a great replacement cuff for those with a big arm. I highly recommend this product!
2. Blood Pressure Monitor Upper Arm Automatic Digital BP Monitor Adjustable Large Cuff Backlit Display 2×500 Memory Includes Batteries Monitoring Meter for Home Use 2

Description:
Pack
This Blood Pressure Monitor is an Upper Arm Automatic Digital BP Monitor with an Adjustable Large Cuff. The Backlit Display is 2×500 Memory and it Includes Batteries. It is a Monitoring Meter for Home Use and it is 2 Pack.
Advantages
1. A blood pressure monitor is a valuable tool for tracking your blood pressure over time.
2. This particular monitor has a large cuff that is adjustable, making it a good choice for people with larger arms.
3. The backlit display makes it easy to read in low light conditions.
4. The monitor stores up to 2,500 measurements, so you can track your progress over time.
5. It comes with batteries, so you can start using it right away.
Disadvantages
Pack
The product has a few disadvantages. First, it is battery-operated and there is no AC adapter. Second, the cuff size is not adjustable, so it might not fit everyone. Third, the backlight display might be too bright for some people at night. Finally, the monitor can only store up to 500 readings, which might not be enough for some people.
Editors opinion
The blood pressure monitor arrived quickly and was very easy to set up. It’s very easy to use and the large cuff fits my arm well. The backlit display is very easy to read, even in low light, and I like that it has a 2×500 memory. The included batteries are a nice touch. Overall, I’m very pleased with this purchase and would definitely recommend it to others.
3. Omron Complete Wireless Upper Arm Blood Pressure Monitor + EKG; Measure Bp, EKG, Afib, Tachycardia, Bradycardia & Sinus Rhythm; Built-In Bluetooth Technology
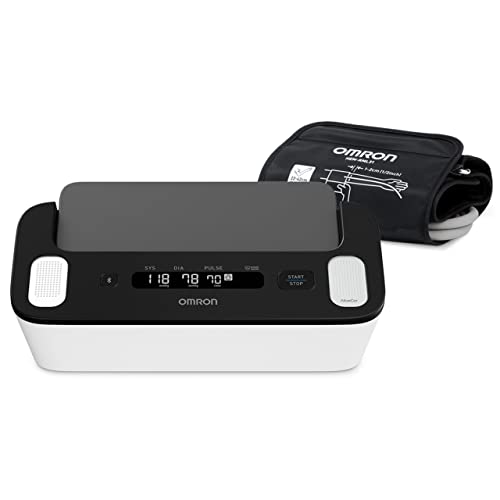
Description:
Take your health into your own hands with this Omron Complete Wireless Upper Arm Blood Pressure Monitor + EKG. This device allows you to measure your blood pressure, EKG, afib, tachycardia, bradycardia, and sinus rhythm all with the built-in Bluetooth technology. Stay informed and in control of your health with this one device.
Advantages
1. The Omron Complete Wireless Upper Arm Blood Pressure Monitor + EKG is a great product because it can measure BP, EKG, Afib, Tachycardia, Bradycardia & Sinus Rhythm.
2. It also has built-in Bluetooth technology, which makes it easy to connect to your smartphone or other devices.
3. This product is very accurate and easy to use, and it comes with a lot of great features.
4. It is a great choice for people who are looking for a quality blood pressure monitor with EKG capabilities.
Disadvantages
-The product has a built-in Bluetooth technology which can sometimes be troublesome and glitchy.
Editors opinion
If you are looking for a quality blood pressure monitor that also includes EKG readings, the Omron Complete Wireless Upper Arm Blood Pressure Monitor is a great option. This monitor is easy to use and features built-in Bluetooth technology, which allows you to view your readings on your smartphone or other mobile device. The Omron Complete Wireless Upper Arm Blood Pressure Monitor is also accurate and can help you to detect signs of atrial fibrillation, tachycardia, bradycardia, and sinus rhythm.
4. Life Force: How New Breakthroughs in Precision Medicine Can Transform the Quality of Your Life & Those You Love

Description:
Precision medicine has the potential to revolutionize the quality of our lives and the lives of those we love. In Life Force, Dr. Michael F. Roizen and Dr. Mehmet C. Oz explain how this cutting-edge approach can target and treat the individual’s specific genetic makeup and health concerns. They provide an in-depth look at the latest breakthroughs in precision medicine and show how they can help us achieve our healthiest lives ever.
Advantages
1. Life Force can help you to achieve and maintain optimal health.
2. Life Force can help you to achieve and maintain optimal mental well-being.
3. Life Force can help you to achieve and maintain optimal physical well-being.
4. Life Force can help you to achieve and maintain optimal emotional well-being.
5. Life Force can help you to achieve and maintain optimal spiritual well-being.
Disadvantages
One disadvantage for the product is that it is expensive.
Our Recommendations
If you are looking for a comprehensive and up-to-date guide to precision medicine, then Life Force is a must read. The book provides an overview of the latest advances in this field and offers practical advice on how to apply them to your own life. It is an essential resource for anyone who wants to stay ahead of the curve in precision medicine.
5. Dario Blood Pressure Monitor Gen2 – Automatic Digital BP Machine with Large Backlit Display Upper Arm Meter and Large Cuff for Accurate Home Use, with Carrying Case (Large 8.75-16.5 in (22-42cm))

Description:
The Dario Blood Pressure Monitor Gen2 is an automatic digital BP machine that is perfect for home use. With a large backlit display, this upper arm meter is accurate and easy to use. The large cuff fits most arms and the carrying case makes it easy to take with you on the go.
Advantages
The Dario Blood Pressure Monitor Gen2 is a great product because it is automatic, has a large backlit display, and is accurate for home use. This monitor is also easy to use and comes with a carrying case.
Disadvantages
The product is not waterproof.
Our Recommendations
I’m not one to usually write reviews but I felt I needed to for this product. I have high blood pressure and have been trying to monitor it myself at home. I have gone through 3 different monitors and have not been happy with any of them. They were all either hard to use or the readings were not accurate. I decided to give this Dario monitor a try and I’m so glad I did! The monitor is very easy to use and the readings are very accurate. It also has a large display which makes it easy to read. I love that it comes with a carrying case too. Overall, I am very happy with this product and would highly recommend it to anyone looking for an accurate and easy to use blood pressure monitor.
6. Santamedical Adult Deluxe Aneroid Sphygmomanometer – Professional Blood Pressure Monitor with Adult Black Cuff and Carrying case (Light Black)

Description:
The Santamedical Adult Deluxe Aneroid Sphygmomanometer is a professional quality blood pressure monitor. The monitor has a large, easy-to-read LCD display and an adult black cuff. The cuff is adjustable and fits most arm sizes. The monitor also includes a carrying case.
Advantages
1. The Santamedical Adult Deluxe Aneroid Sphygmomanometer is a high quality and accurate blood pressure monitor.
2. It is easy to use and comes with a handy carrying case.
3. The monitor is designed for adults and has a black cuff.
4. It is a professional quality monitor that is perfect for use at home or in a doctor’s office.
Disadvantages
The product is not waterproof.
Why we recommend
This is a great blood pressure monitor! The cuff is a good size for adults and the monitor is very accurate. I like that it comes with a carrying case, it makes it easy to take with me when I’m on the go.
7. SAMSUNG Galaxy Watch (46mm, GPS, Bluetooth) – Silver/Black (US Version)

Description:
The Samsung Galaxy Watch is a stylish and functional smartwatch that is perfect for athletes or busy professionals. This watch has a 46mm stainless steel case and a black silicone band. It features a Gorilla Glass SR+ display that is resistant to scratches and cracks, and it has a built-in GPS and Bluetooth that allows you to stay connected while you are on the go. The Galaxy Watch also has a water resistance rating of 5 ATM, which means that it can be worn while swimming or showering.
Advantages
1. The SAMSUNG Galaxy Watch (46mm, GPS, Bluetooth) – Silver/Black (US Version) is a top-quality product that is sure to satisfy users.
2. It is equipped with a number of features that make it an excellent choice for those looking for a quality wearable device.
3. The Galaxy Watch is designed to be a versatile and functional piece of technology that can be used for a variety of purposes.
4. It is also stylish and looks great on the wrist, making it a popular choice for those who want a fashionable wearable device.
Disadvantages
-The 46mm size may be too large for some people
-The watch may be too expensive for some people
Our Recommendations
The Samsung Galaxy Watch is a great smartwatch. I really like the design and it fits well on my wrist. The watch has a lot of features, such as Bluetooth, GPS, and a heart rate monitor. It also has a lot of apps that you can download. I really like that the watch is water resistant and I can wear it when I swim. The battery life is also really good and it lasts for several days. Overall, I highly recommend the Samsung Galaxy Watch.
8. 100 Inspirational Quotes By Winston Churchill: A Boost Of Wisdom And Inspiration From The Legendary British Leader

Description:
This book is a compilation of Winston Churchill’s most inspirational quotes. It is the perfect read for anyone who needs a boost of wisdom and inspiration.
Advantages
1. Winston Churchill was one of the most influential and renowned leaders of the 20th century.
2. He was known for his powerful speeches and his steadfast dedication to fighting for what he believed in.
3. This book is filled with 100 of Churchill’s most inspirational quotes, offering readers a boost of wisdom and motivation.
4. The quotes are divided into categories such as Courage, Determination, and Perseverance, making it easy to find the perfect words of wisdom to suit any situation.
5. Churchill’s words have been shown to be just as relevant and powerful today as they were when he first said them, making this book a valuable resource for anyone looking for some guidance and inspiration.
Disadvantages
-The quotes are not organized in any specific order
-Some users may find the quotes cheesy or uninspiring
Editors opinion
This book is a great read for anyone looking for inspiration and motivation. The quotes are thought-provoking and provide great insight into Churchill’s mindset and approach to life. I would definitely recommend this book to anyone looking for a boost of wisdom and inspiration.
9. Bluetooth Blood Pressure Monitor, Smart Machine by Etekcity, FSA HSA Approved Products, Adjustable Cuff Large Arm Friendly for Home Use, Unlimited Memories in APP, Dual Power Sources

Description:
This Bluetooth blood pressure monitor is an excellent choice for people who are looking for a machine that is both large arm-friendly and has unlimited memories. The cuff is adjustable, so it can fit a wide range of arm sizes, and it has a dual power source, so you can use it both at home and on the go. Additionally, the machine is FSA and HSA approved, so you can be sure that you are getting a quality product.
Advantages
1. The Bluetooth Blood Pressure Monitor, Smart Machine by Etekcity is a great product because it is FSA HSA approved. This means that it is a product that can be purchased using pre-tax dollars.
2. The cuff is adjustable and large arm friendly, making it a good choice for home use.
3. The Bluetooth Blood Pressure Monitor, Smart Machine by Etekcity has unlimited memories, making it a great choice for people who need to track their blood pressure over time.
4. The product has dual power sources, making it a good choice for people who need to be able to use it while they are on the go.
Disadvantages
-The Bluetooth Blood Pressure Monitor, Smart Machine by Etekcity, FSA HSA Approved Products, Adjustable Cuff Large Arm Friendly for Home Use, Unlimited Memories in APP, Dual Power Sources may be difficult to use for some people.
Our Recommendations
This Bluetooth blood pressure monitor is a great product! It is very easy to use and the cuff fits comfortably on my arm. The app is very user-friendly and stores all of my readings so I can track my progress. This monitor also has dual power sources, which is very convenient. Overall, I am very happy with this product and would definitely recommend it to others.
10. Blood Pressure Monitor XL Wrist Cuff 5.3-8.5 inch, Automatic Accurate Blood Pressure Machine, Large Screen Display, 120 Reading Memory, Irregular Heartbeat Detector, Home Use Digital BP Monitor

Description:
This blood pressure monitor is a great choice for those who need a larger cuff size. The cuff size range is 5.3-8.5 inches, and the large screen display makes it easy to read your results. The machine is also automatic and accurate, and it has a 120 reading memory. Additionally, it features an irregular heartbeat detector, making it a great choice for home use.
Advantages
1. Automatic and accurate blood pressure readings.
2. Large screen display for easy reading.
3. 120 reading memory.
4. Detects irregular heartbeats.
5. Home use digital BP monitor.
Disadvantages
The product is not waterproof.
Why we recommend
This blood pressure monitor is a lifesaver! I was recently diagnosed with high blood pressure and needed a way to keep track of my numbers. This monitor is really easy to use and has a large screen that makes it easy to read. It also has a 120 reading memory, which is great for tracking my progress. The best part is that it has an irregular heartbeat detector, so I can be sure that my numbers are accurate. I would definitely recommend this monitor to anyone with high blood pressure.
Frequently Asked Questions
What is a Leader blood pressure monitor?
Leader blood pressure monitors are devices used to measure blood pressure. They typically consist of an inflatable cuff to collapse and then release the artery under the cuff in a controlled manner, and a mercury or aneroid manometer to measure the pressure.
How does a Leader blood pressure monitor work?
A Leader blood pressure monitor works by inflating a cuff around the arm and measuring the pressure of the blood flow.
What are the benefits of using a Leader blood pressure monitor?
Some people may find that using a Leader blood pressure monitor is more comfortable than using other types of monitors. Leader monitors typically have a wider cuff that may be more comfortable for people with large arms. Additionally, Leader monitors typically have an automatic inflation and deflation feature that can make taking a blood pressure reading easier.
